
Be able to add a CSS class to a WordPress menu allows to make style changes of a specific menu item.
Your WordPress menu plays an important role for the visitors of your site. It is like a map that helps them to get to the right place on the site.
Without such map, it will be super hard for visitors to find information quickly and easily, which will cause a negative user experience for them. As a result, they will leave your site.
In this article, I show you how to add a custom CSS class to a WordPress menu in order to highlight a specific menu item.
CSS class option in menus
You do not need to write a custom PHP code or install any additional plugins to be able to set your own CSS class in menus.
WordPress provides such feature. However, it is hidden by default. Thus, you will need to enable it in order to use it.
In WordPress dashboard, there are two (2) places where you can add a custom CSS class to your menu link:
Below, you can find both ways of adding a custom CSS class to a WordPress menu, using a native functionality only.
The Menus page
In this method, I use the Prosperity theme to illustrate a use of a custom CSS class in the menu item, added via the Menus page.
First, we need to create a custom CSS class.
Since I want to change a color and font weight of the menu item, I use the following custom CSS:
.menu-link-red a {
  color: #b93054;
  font-weight: bold;
}
Note, I use menu-link-red as a name for my CSS class. You can use any name that better fits your needs.
Next, I need to add this custom CSS to my site. For this example, I use a native WordPress functionality to add a custom CSS to the site.
Once a custom CSS is added, time to change an appearance of the menu link by using a new CSS class.
Follow these steps to add a custom CSS class to the menu item:
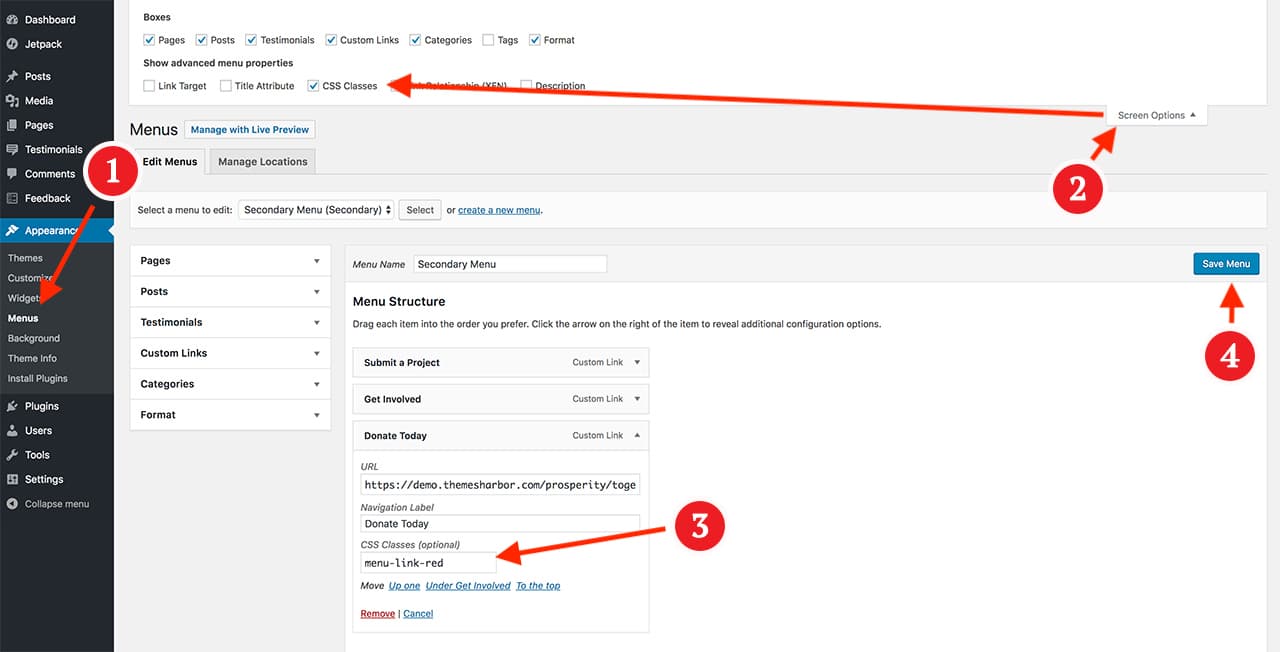
- In your dashboard, navigate to Appearance → Menus.
- On the Menus page, find the Screen Options tab. It should be located on the top right corner of the page in your WordPress admin area.
- Under Show advanced menu properties, check CSS Classes.
- Now expand your menu item to reveal the CSS Classes (optional) text input.
- Enter your class name under the CSS Classes (optional) label.
- Save your menu to apply a class.
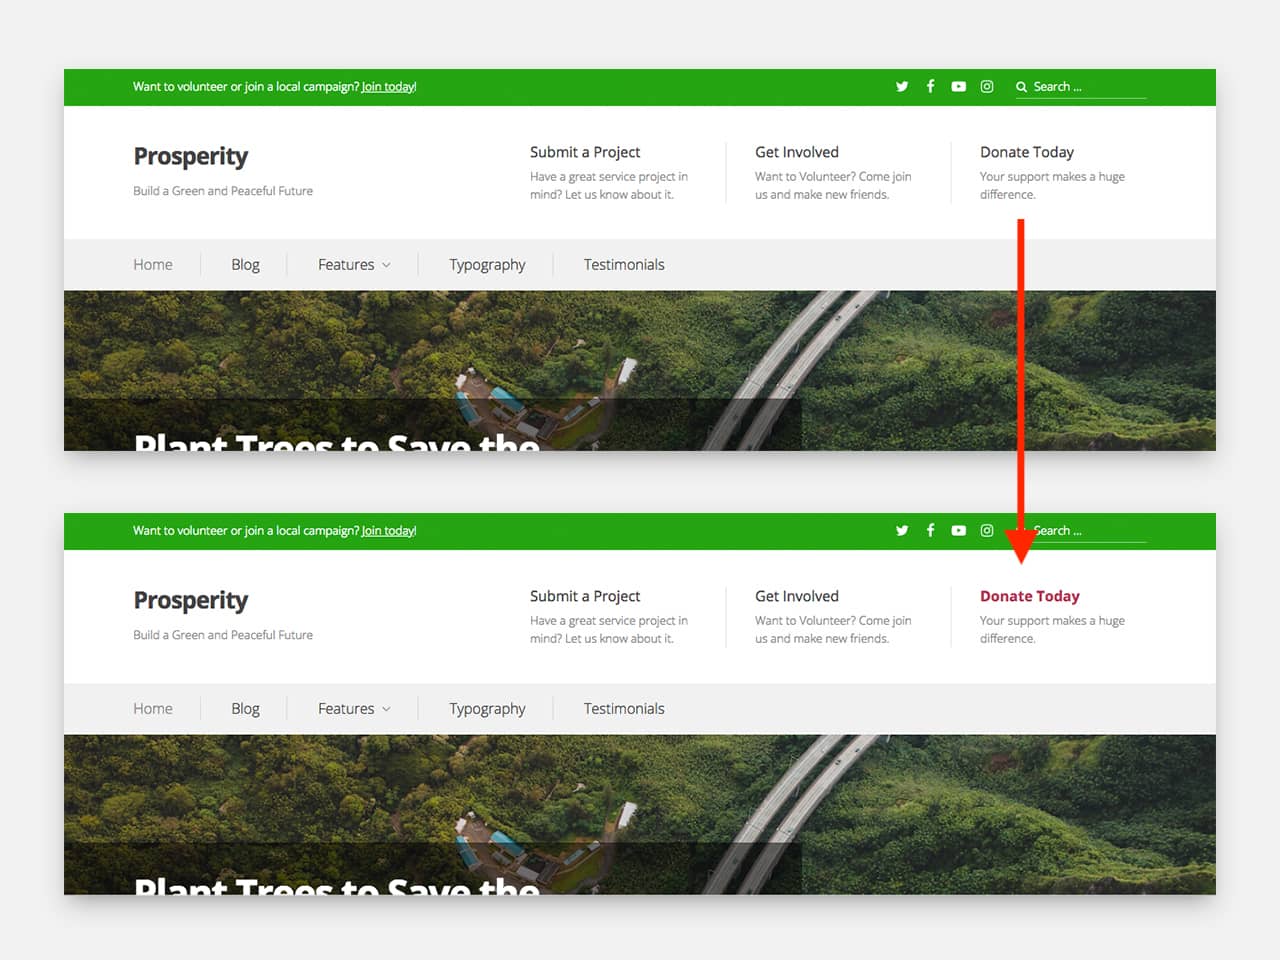
Below, you can find screenshots of the menu before and after to show a difference.
Your menu might look different because of using different themes. In general, you should see the change.
The Customizer
The Customizer helps to change the appearance and functionality of your WordPress site from a single, manageable interface.
In this method, I use the Venture theme to show how to create a different style for the menu link, using the Customizer.
My goal is to have a round menu link, with a plain background color.
To achieve it, I use the following custom CSS:
.menu-link-rounded a {
  background-color: #5454e6;
  padding: 0 20px;
  border-radius: 30px;
  text-shadow: none;
  font-weight: bold;
}
Note, you can name the CSS class as you like. For this specific case, I use menu-link-rounded as a name for my CSS class.
After custom CSS, time to apply the CSS class to the menu item, using the Menus options in the Customizer.
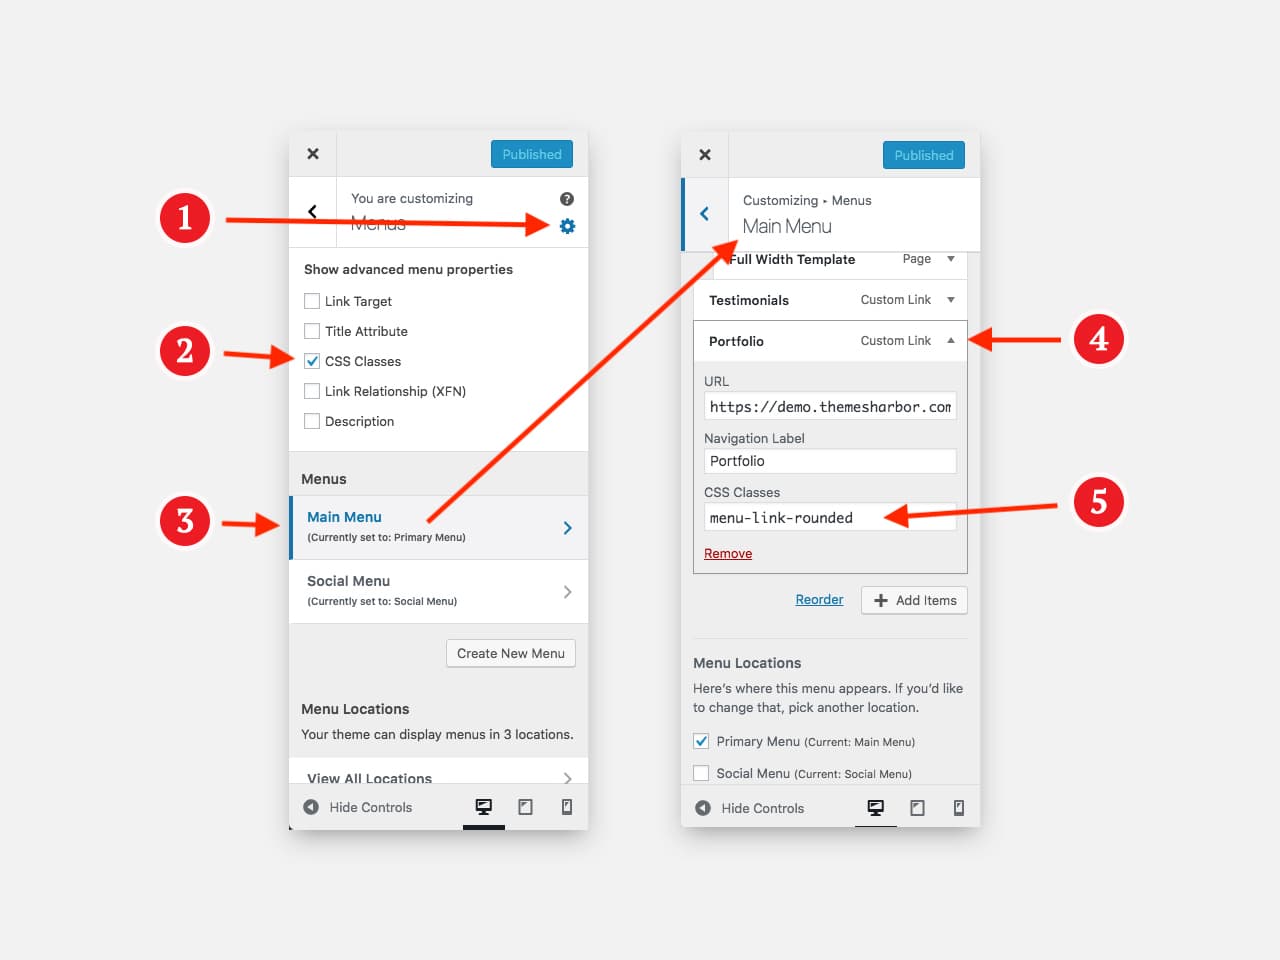
In WordPress dashabord:
- Navigate to Appearance → Customize to open the Customizer.
- Click Menus link to open the Menus panel.
- Find a gear icon and click on it to make sure that CSS Classes is checked under the Show advanced menu properties label. If this option is not checked then check it to be able to add custom classes to the menu links.
- Select the menu where you want to have your CSS class.
- Expand your menu item and enter your class name under the CSS Classes (optional) label.
- Click Publish at the top of the panel to save your menu and apply a custom class to the link.
Below, you can find a result of using a custom CSS in the menu link.
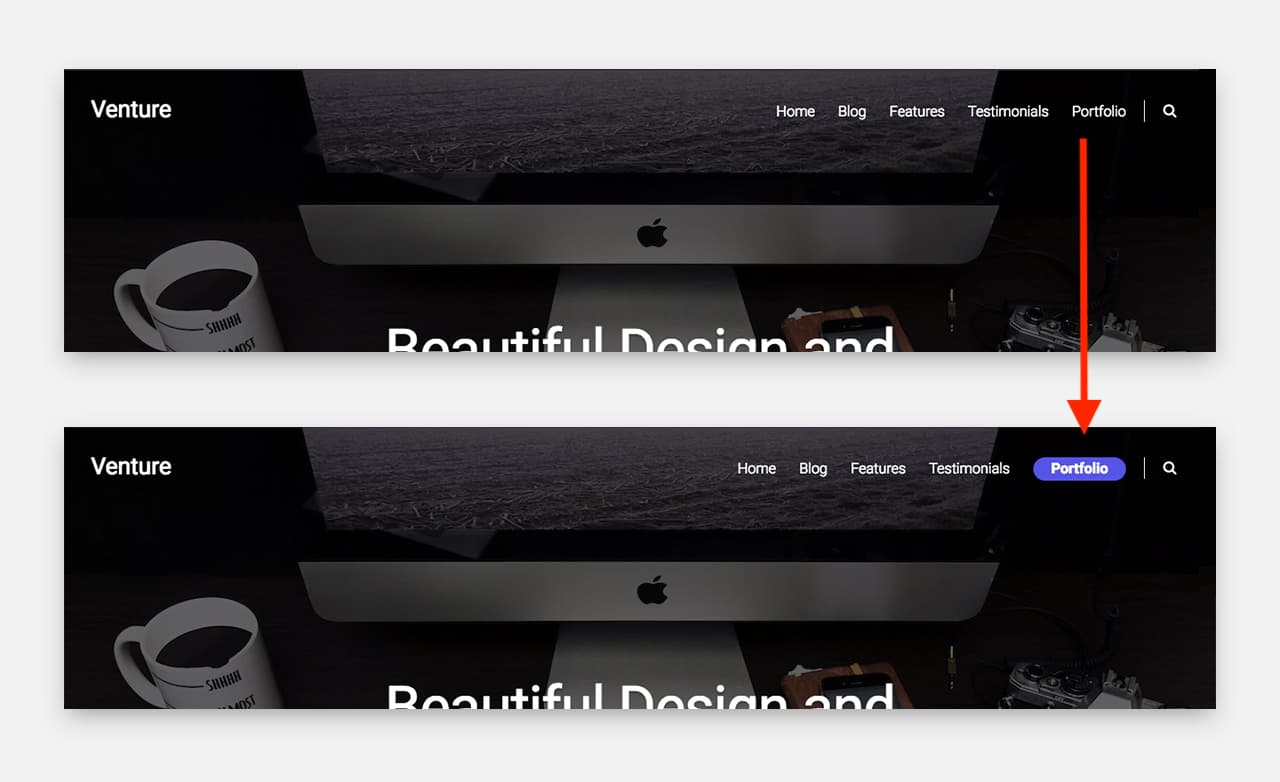
So, adding a custom class to WordPress menu helps to highlight important links. And thus, it can lead to a positive effect on traffic, conversions and user-friendliness of your site.
Custom CSS does not work
There can be cases when your custom CSS will not work. The main reason of it is that your theme overrides your custom styles.
In that case, you might try to increase specificity of your custom CSS class. It can be done by duplicating the CSS class name:
.menu-link-rounded.menu-link-rounded a {
  background-color: #5454e6;
  padding: 0 20px;
  border-radius: 30px;
  text-shadow: none;
  font-weight: bold;
}
Note, it is not considered as a good practice, and can be used only as a temporary solution. For a better solution, you might want to contact the author of your theme.
Leave a Reply