Category is one of default features in WordPress, which helps to sort and group blog posts.
Table of contents:
- Add category
- Add sub-category
- Edit category
- Delete category
- Delete multiple categories
- Set default category
- Categorize posts
- Create category from editor
- Find category ID
- Find category slug
- Add category link to menu
- Exclude categories
Categories are flexible in WordPress.
WordPress allows to create primary and sub categories. So, you can have hierarchical arrangement of blog articles.
Besides, a blog post can have more than one category.
In this article, you can learn different ways to manage category in WordPress.
Add category
No plugins needed to create category in WordPress.
To add category:
- Go to Posts → Categories page.
- Enter category name, its slug (category URL), and category description.
- Click Add New Category.
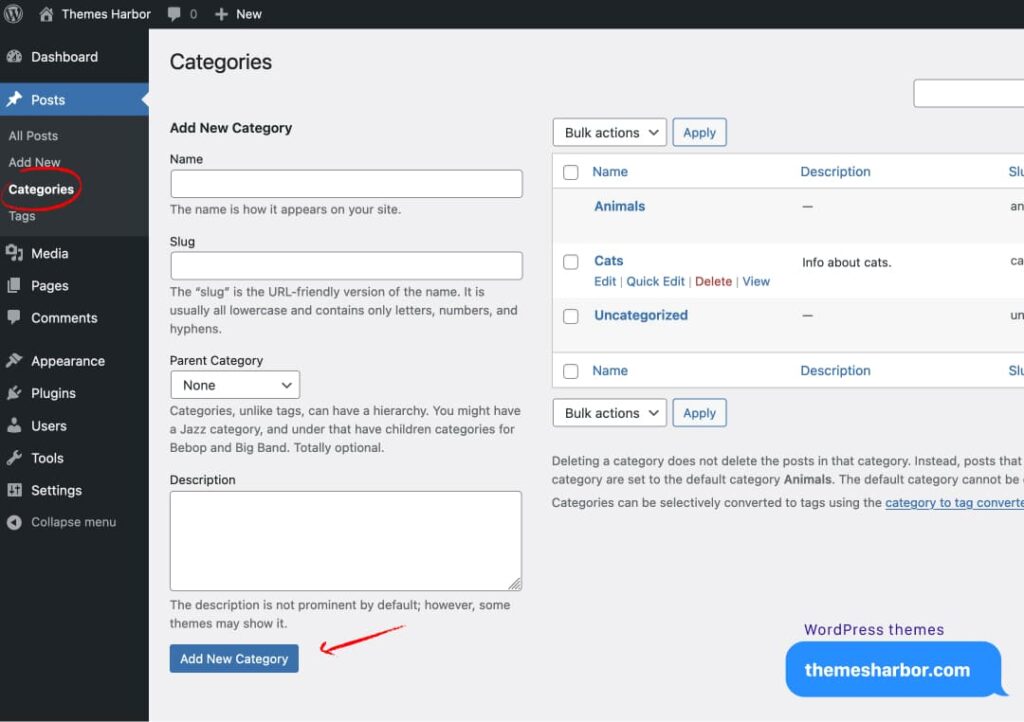
After that, new WordPress category will appear in the category list.
Add sub-category
You can also have sub-categories.
Sub-categories, or child categories, depend on a top level category, also known as parent category.
The process is similar to adding a regular category. The only difference is a use of the Parent option.
To have a hierarchy for categories, choose the parent category when creating a sub-category.
Edit category
You can edit the name, slug, parent category, and description of your existed category.
To edit category:
- Locate the category list on the Category page.
- Put the cursor over the category item in the list.
- Click Edit below the name of the selected category.
- Make needed changes to the name, slug, parent, and description.
- Click Update at the bottom of the page when you’re ready.
After, every posts will display the updated version.
Delete category
The process of deleting a category is similar to the Edit process.
Simply hover over the category item in the list. Then, click Delete to permanently remove the category.
Most importantly, removing a category does not delete its posts. Instead, blog posts will be assigned to the default category.
Note, you cannot remove the default category.
Delete multiple categories
To permanently delete multiple categories at once:
- Click the checkboxes next to the categories you would like to delete.
- Choose Delete from the Bulk Actions dropdown list at the top of the page.
- Click the Apply button to immediately delete the selected categories.
Note, you will not be prompted to confirm your choice.
Set default category
WordPress comes with a default category. The name of the category is Uncategorized.
However, you can to remove the Uncategorized category, and to set own default category.
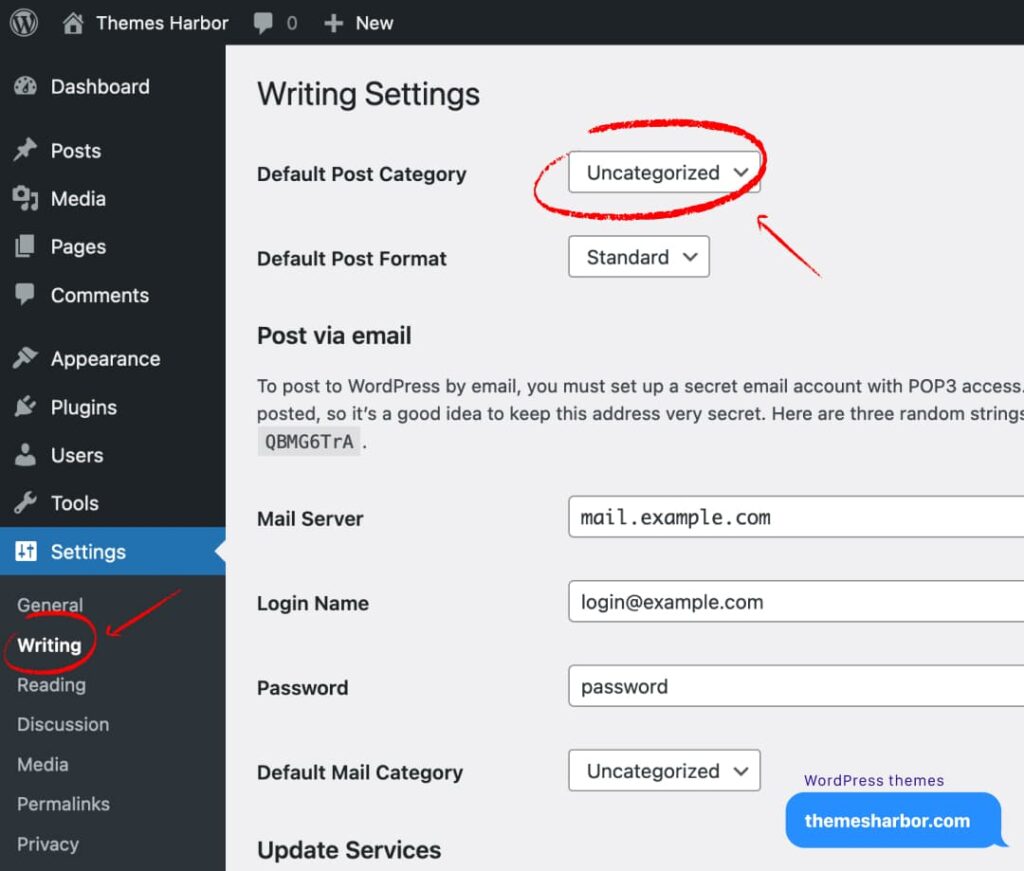
To define new default category in WordPress:
- In dashboard, go to Settings → Writing.
- In Default Post Category section, select your new category.
- Save your changes.
Note, you must have at least one new category to be able to delete the Uncategorized category.
Categorize posts
You can assign posts to categories using the editor.
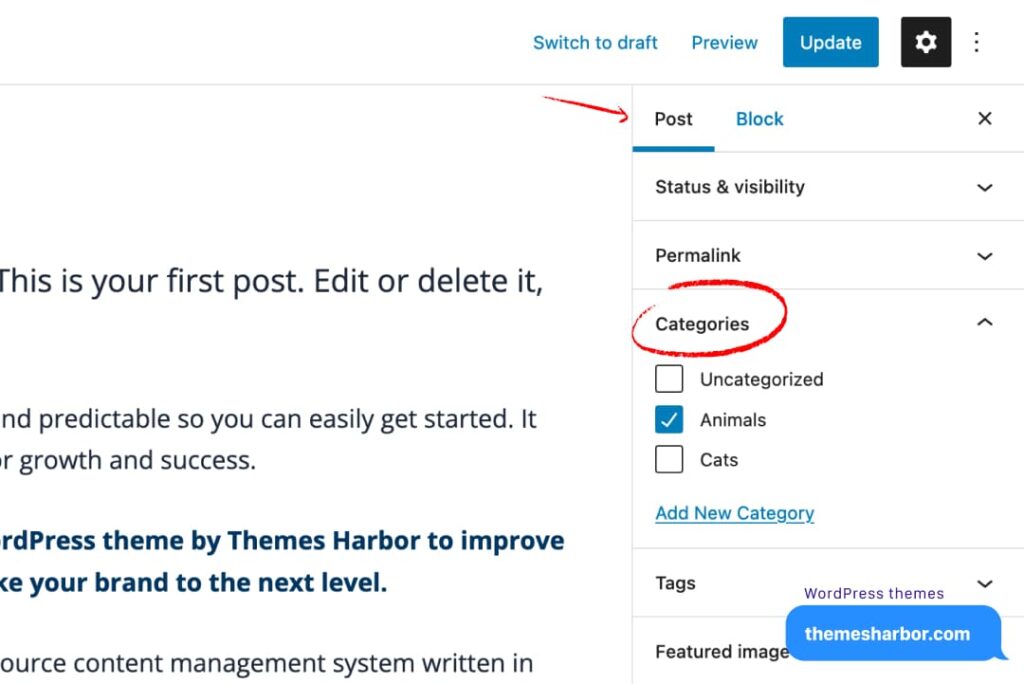
- Open your post in the editor.
- Under Post Settings in the sidebar, expand the Category panel.
- Click the checkbox next to the category you want to have for your post.
- Publish or Update your post when you are ready.
Now, the post has your selected category.
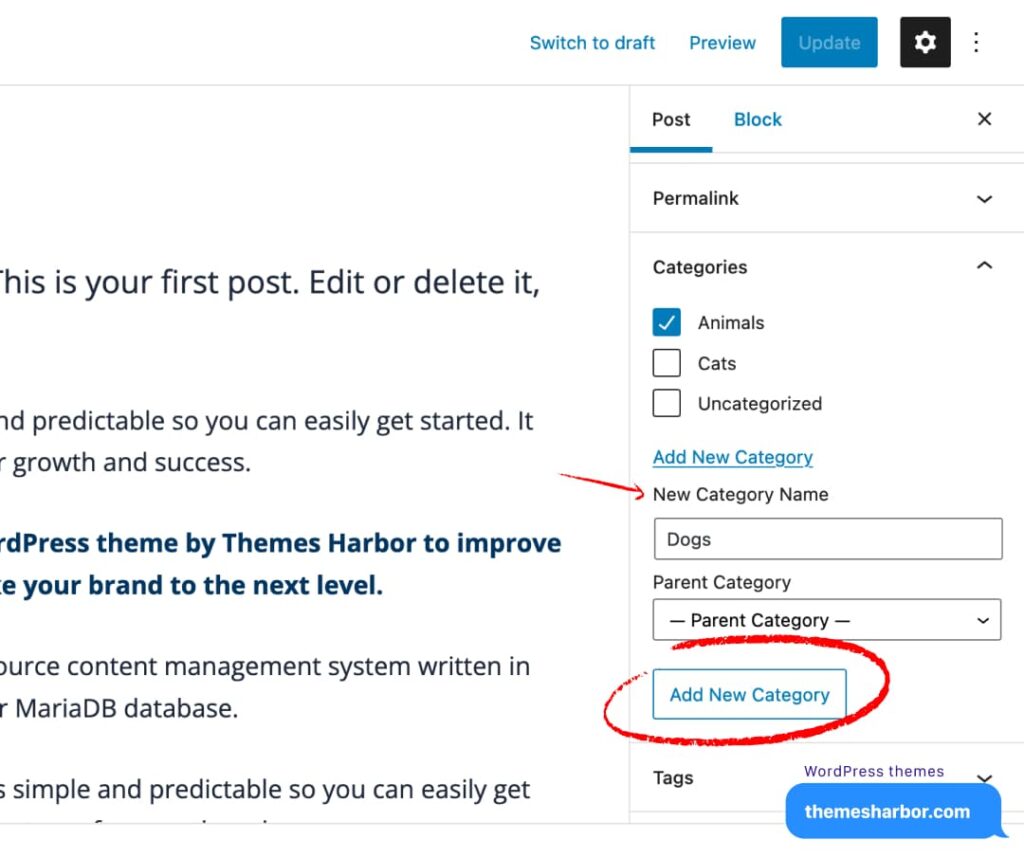
Create category from editor
There is a quick method to add category without a need to leave the editor.
- In Category panel, click Add New Category to view an option to add the name of the category.
- Enter category name.
- Click Add New Category to add category.
However, the editor does not allow to add description.
You can add description to the newly created category in Posts → Categories.
Find category ID
You can find ID of a specific category by going to Posts → Categories:
- Locate the category in the list and put cursor over the selected category.
- Click Edit link under the category name to open the Edit Categories page.
- Find the Category ID in the page URL after tag-ID at the top of your browser window.

Find category slug
You can locate the category slug in the Edit Categories page under the Slug label.
Add category link to menu
WordPress allows to add category links to menus.
- Navigate to Appearance → Customize → Menus.
- Choose your menu where you want to add a link.
- Click on Add Items to view available menu items.
- Select Categories.
- Click the + icon next to the category you want to add.
- Publish your changes.

After, the category link in the menu will redirect site visitors to a page that shows posts with that category only.
Exclude categories
WordPress does not provide any options to hide a specific category either on homepage, or on any archive view.
However, there is a way to exclude categories in WordPress.
Ultimate Category Excluder provides easy option to exclude a category in WordPress with just a couple of clicks. This is a free plugin from a WordPress repository.
To exclude categories via plugin:
- In dashboard, navigate to Plugins → Add New.
- Search for Ultimate Category Excluder.
- Install and activate the plugin.
- Go to Settings → Category Excluder.
- Select categories you want to exclude.
- Click the Update button at the bottom of the page.

If you have questions or bug reports regarding the plugin, use the plugin’s dedicated support forum.
Conclusion
Hope, this tutorial was helpful for you to learn methods to manage category in WordPress.
Leave a Reply